Sometimes smart ideas takes time. But maybe using distcc from now on will catch up some of the lost time.
It’s a bit embarrassing that it took me one year before I thought about setting up distcc, even though I perfectly new what it was!
I’ve been working from home the last year due to Covid-19. I also have a Linux-server in the basement - just because it’s fun. I use that server more or less for nothing. But it still fun to have - for nothing. Then the other day it just came to me.
Why not use that server to speed-up my builds!
So here is some tips/thoughts/instructions on how to let distcc speed-up your builds. And I can tell you right now - you gain speed!
distcc
If you look at distcc:s Github page you can read.
distcc is a program to distribute compilation of C or C++ code across several machines on a network. distcc should always generate the same results as a local compile, is simple to install and use, and is often two or more times faster than a local compile.
And that’s more or less it! distcc will distribute you build jobs on to other computers. You simply run distcc like this:
$ distcc gcc -c foo.c
In the last part of this post I will go through a bit more in detail how to integrate distcc into a project. The above is just a simple example.
When distcc runs it will automatically send over the data the build-node need. Nothing (except compilers) needs to be installed on the other machines. No source files or object files are needed or will be stored on the other machines. Since distcc uses the network for all this it’s nice to have a network with pretty good speed. But even a WiFi works.
distcc on your machine and servers
Installation
You need to install distcc both on your development machine and the servers you plan to use for building. If you use Ubuntu it’s as simple as:
$ sudo apt install distcc
Configure distcc
When reading about distcc there are two ways of configuring it. The old way or what is called zeroconf. We will go with the new (from around 2007 :) ). When using zeroconf distcc will use mDNS (using Avahi) to automatically detect different computers/nodes to use for building. You also need to configure which network interfaces distcc shall listen to.
Below is my configuration on my server (/etc/default/distcc)
STARTDISTCC="true"
ALLOWEDNETS="192.168.1.0/24"
LISTENER="192.168.1.200"
NICE="10"
JOBS="10"
ZEROCONF="true"
- STARTDISTCC - Will make sure to start
distccat boot. - ALLOWEDNETS - Specifies which IP-addresses are allowed to connect. In this case any one on the net 192.168.1.x.
- LISTENER - Which network interface to listen do connections.
- JOBS - Number of jobs to run in parallel,
- ZEROCONF - Set to true to use mDNS.
That’s more or less it!
Test your setup
To test your setup simply run:
$ distcc --show-hosts
127.0.0.1:3632/14
192.168.1.200:3632/10
The above example show that three nodes/machines are available. My laptop (127.0.0.1) and my server (192.168.1.200).
Compilers
You need to have the same compilers installed across you build machines. So in my case I have GCC 9.3 installed on both my laptop (development machine) and on my server.
Cross-compilation with distcc is possible, but that will be another post.
Build monitors
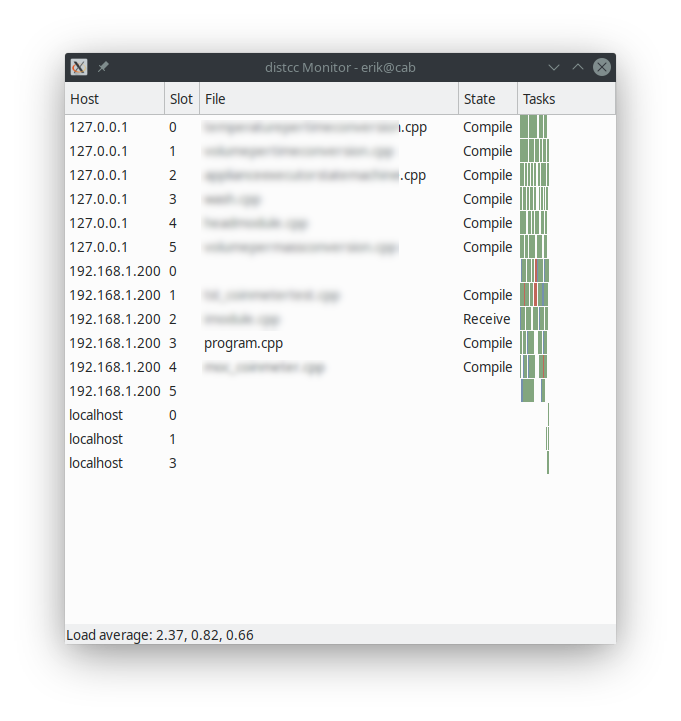
There are a number of different monitors one can use to monitor to build status. distccmon-text is a really simple text based version, distccmon-gnome is a GUI based monitor that will display all your builds.

Setup you project to use distcc
In the beginning of this post I showed how to run distcc. But here I will go into more depth when using distcc with QMake and CMake.
One tip that can speed up your builds even more is to use ccache. Read more about ccache here. In the examples below I will integrate ccache with distcc.
CMake
In CMake there is something called “compiler launcher”. This can be used to tell CMake to run a program to launch a compiler. The nice thing is that you also can specify multiple launcher. So to enable distcc and ccache whit CMake simply:
$ cmake -DCMAKE_C_COMPILER_LAUNCHER="ccache;distcc" -DCMAKE_CXX_COMPILER_LAUNCHER="ccache;distcc" ..
In this example we enable both ccache and distcc.
QMake
I’ve not spent to much time investigating QMake and distcc. The best options a found is to pass some extra arguments to make.
CXX="ccache distcc g++" CC="ccache distcc gcc"
In QtCreator you do this under “Build Settings” -> “Build steps” -> “Make” -> “Make arguments”.
There might be a better solution, let me know in the comments below!
Running at work and at home
Since distcc uses mDNS to find the build nodes to use you can have one setup at home and a much bigger setup at your office. For example, to speed up all my colleges build times we could hava a bunch of machines ready with distcc. When I need to compile my machine will use mDNS to find the nodes. When at work it will find may machines, when at home it will find one node and lastly when offline it will just use my computer. Thanks to this zeroconf in distcc it will work completely transparent.
